
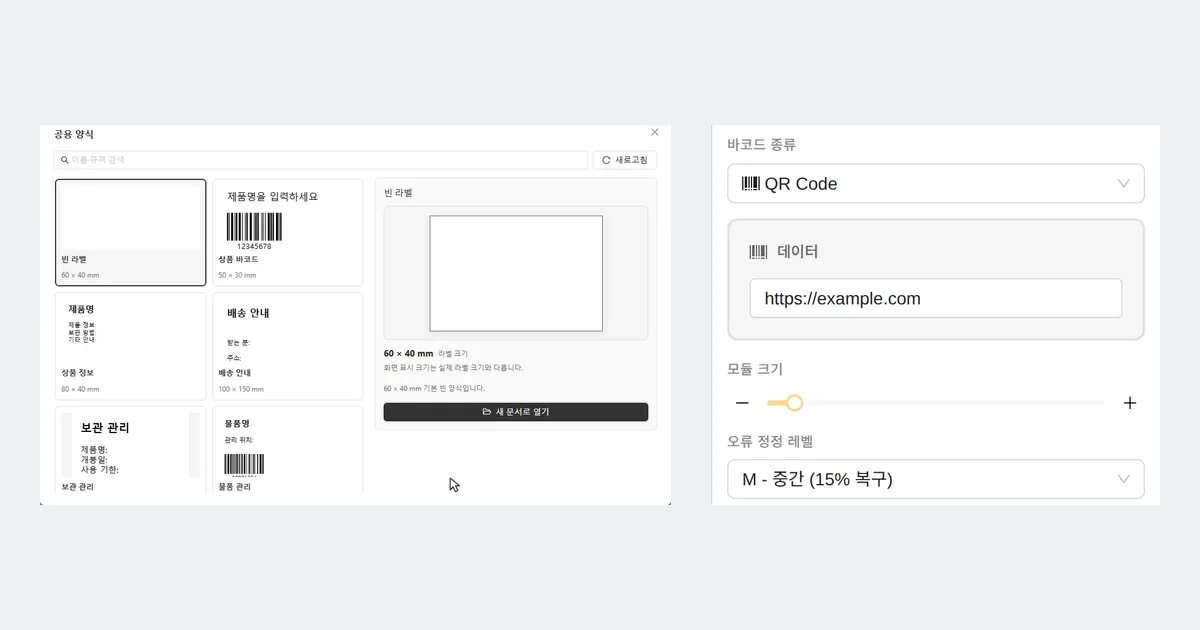
An asset label for office equipment and fixtures carries one ID number both as human-readable text and as a QR code. GoodLabel Designer has a 70×40mm item management shared template, so you get the framework by keeping its item name, location and ID fields and changing only the barcode to a QR code. What's left to decide are 3 things: the ID number rule, linking the asset list in Excel, and a material that lasts for years.
ID number rules and what to put in the QR
Fix the length of the ID number, for example a 2-character category prefix, a 4-digit year and a 4-digit sequence. With 12 characters like OA-2026-0001, the 4-digit sequence covers up to 9,999 units a year, and even sorting as text in Excel never puts 0010 before 0002.
| What the QR holds | Example | QR size at level M | Side including 4-module quiet zone, 0.5mm modules |
|---|---|---|---|
| ID number only | OA-2026-0001 (12 characters) | Version 1, 21×21 modules | 14.5mm |
| Lookup URL + ID number | ID number after an https:// address, 38 characters in all | Version 3, 29×29 modules | 18.5mm |
12 characters of digits, uppercase letters and hyphens fit in version 1 up to level Q, and going up to level H makes it version 2 (25×25 modules). Adding a URL makes each side 4mm larger. If you look up the asset list in Excel or an in-house system, put in only the number, and add a URL only when scanning with a phone camera needs to open the lookup screen directly. Capacity tables for versions 1–7 and module size calculations are in QR code label size.
Turning the item management template into a QR label
The item management template consists of an item name in 12pt bold, a location in 9pt and a 10mm-tall CODE128 barcode (sample number 00001234).
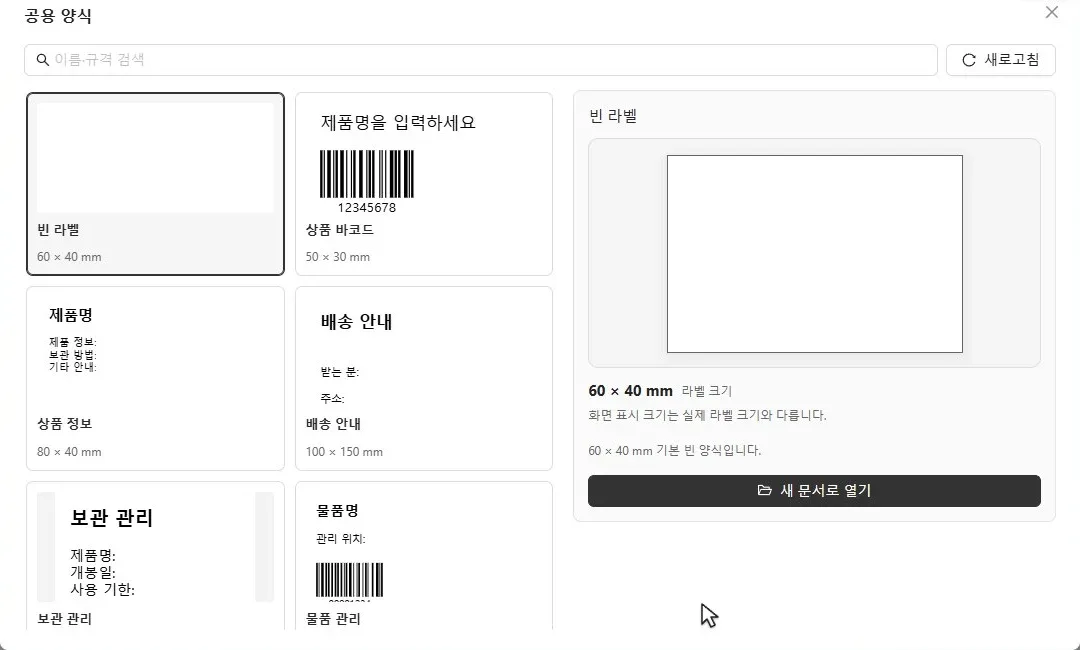
- On the start screen, open the shared templates, choose the item management template (70 × 40 mm) and click the button that opens it as a new document.
- Select the CODE128 object and change Barcode type in the Properties panel to QR Code. A QR changed this way is set to 1mm modules, so version 1 is 21mm per side; reduce Module size to 0.5mm. The designer doesn't draw the quiet zone around a QR, so the object is 10.5mm, and you leave the 2mm (4 modules) around it empty.
- Place the QR 3mm in from the right edge of the label. Taking away the 14.5mm square including the quiet zone leaves about 50mm of width on the left for the item name, location and ID number text line.
- Add one more text object for the ID number and set it to 12pt. If the QR gets scratched and won't read, use these 12 characters to find the item in the list.
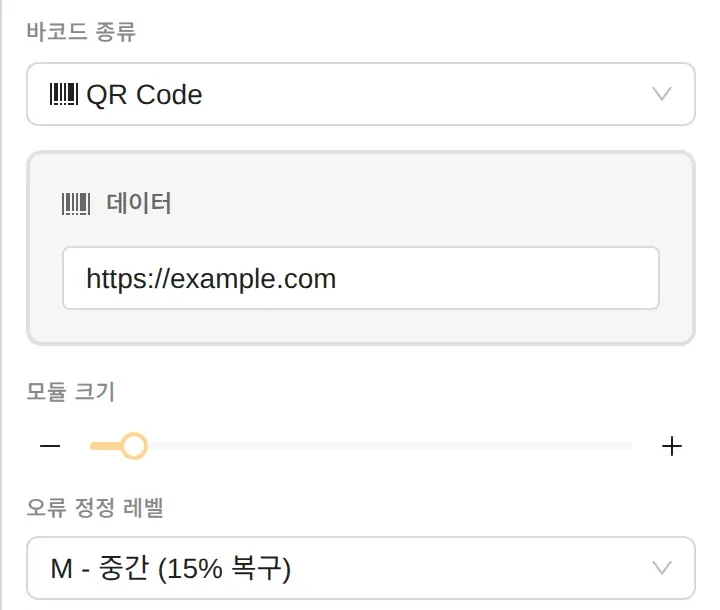
Start with the default error correction of M (15% recovery). If the label goes somewhere it gets scratched, such as the underside of a laptop handled often or on tools, you can raise it to Q (25% recovery), and the 12-character ID number stays at version 1, so the size doesn't grow.
Linking the asset list in Excel and printing in one go
If your asset register in Excel has columns for ID number, item name, department and location, load the file with Connect data in the tool panel and choose a column name in each object's Linked field. Link both the QR and the ID number text to the same ID number column. When adding a lookup URL, put the first 26 characters of the URL in the QR's Prefix field and keep only the 12-character number in Excel.
- When labeling 200 assets for the first time, set Print quantity settings in the Print window to Same for all records with 1 copy, and select all rows.
- To reprint just one label that fell off, set the search column to the ID number in Search data, enter the number as the search term and check only that row.
- To relabel only one department's assets, change the search column to the department and tick the select-all checkbox, which selects every search result while a search is active.
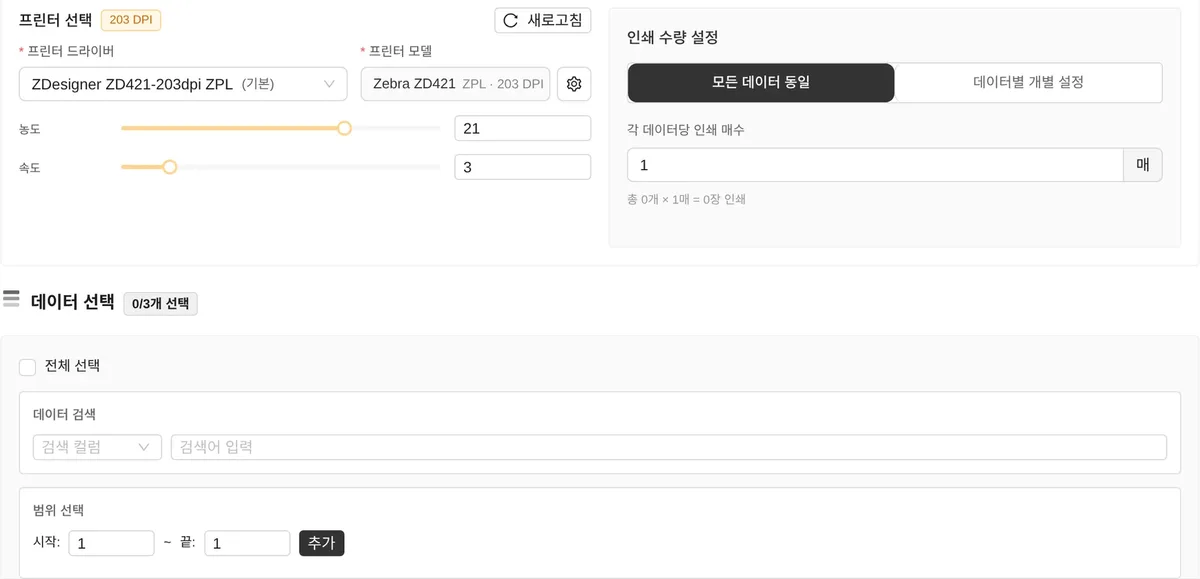
If even one object uses Insert date or Generate serial numbers, you can't choose Excel data linking on the other objects, so if you put the acquisition date on the label, keep it as a date column in Excel. The rule of putting column names in row 1 and handling numbers that start with 0 are covered in Bulk printing from Excel or CSV.
Material and ribbon for labels that stay on for years
Direct thermal labels keep reacting to heat and light after printing and the background darkens, so they aren't used for identification labels meant to stay on for life, and asset tags are a typical use of thermal transfer. An asset label that must stay on until the equipment is disposed of should be thermal transfer, printed with a ribbon.
| Where it goes | Label | Ribbon |
|---|---|---|
| Desks, chairs, cabinets, back of monitors | YUPO labels 70×40mm | wax/resin ribbon 80mm |
| Equipment and tools often wiped with alcohol | YUPO labels | resin ribbon |
| When you've sourced PET labels separately | PET labels | resin ribbon |
YUPO labels are a waterproof synthetic paper, so they also go on pantry items that may get wet, and the 70×40mm size also comes as a set of 5 label rolls and 1 roll of 80mm ribbon. The wax/resin grade withstands moderate to heavy abrasion and chemicals on matte synthetic materials, and the resin grade withstands harsh chemicals on all synthetic materials. GoodLabel's label products don't include PET labels, so if you use PET, run a resin ribbon with rolls sourced elsewhere.
Set the print method in the designer's Printer settings to Thermal transfer. A resin ribbon needs more heat than wax/resin, so test by raising the density one step at a time from the default. Density adjustment by ribbon grade continues in ribbon pairings for GoodLabel labels.