
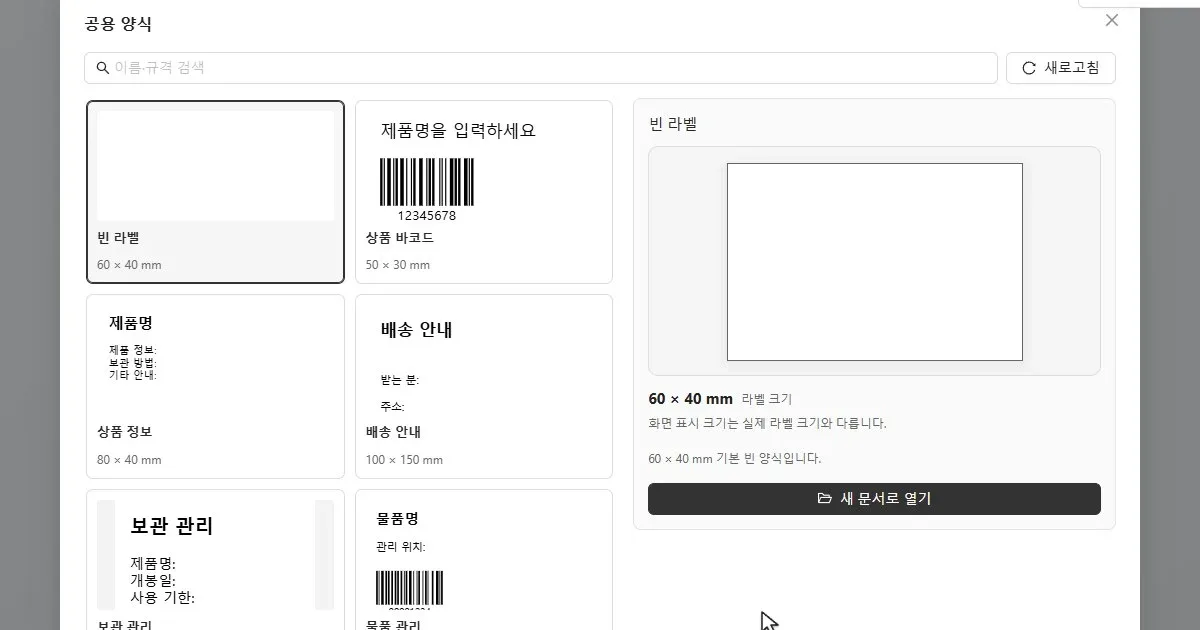
Drawing an 80×40mm information label on a blank screen means first setting the position and size of 2 text boxes, but if you open a shared template of the same size, you just change the text and test-print one label right away. GoodLabel Designer has 6 templates built into the program, from a 60×40mm blank label to a 100×150mm shipping notice, and they open without logging in or an internet connection. Here are the 3 steps: choosing a template, fitting it to your media, and keeping it as your own file.
2 ways to open the shared templates window
- On the start screen that appears when the program launches, click the shared templates card among its 3 cards.
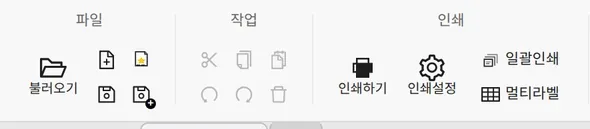
- While editing, in the ribbon's File group, click the second small icon to the right of the large Open button, next to the new document icon (hover over it to see Open template).
Both open the shared templates window; click a template in the list on the left, and a preview and a one-line description appear on the right. The search box at the top searches names and sizes together, so entering "5030" or "50×30" leaves only the product barcode template. In the English interface, this window and the template names still appear in Korean, so this article describes them by what they contain. While a 100-label print job is running, templates don't open, and you only get a message asking you to open them after printing finishes.
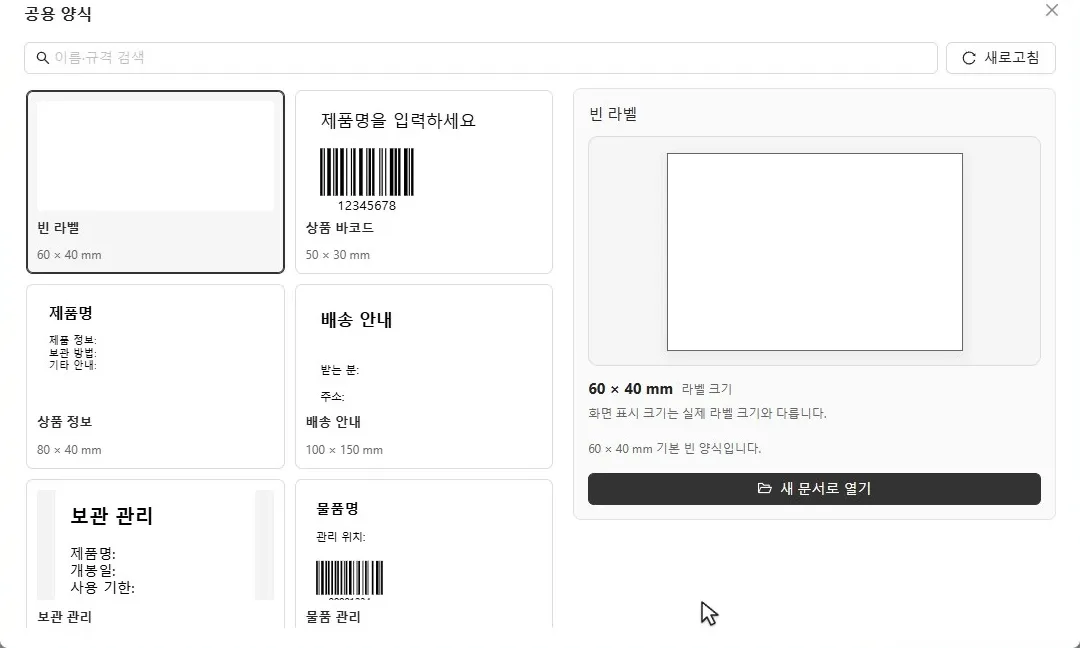
Sizes and objects of the 6 templates
| Template | Size | Objects included | Matching GoodLabel media sizes |
|---|---|---|---|
| Blank label | 60×40mm | None | Direct thermal roll labels and YUPO direct thermal labels 60×40 |
| Product barcode | 50×30mm | One 10pt line of product name, Code 128 sample (12345678) | Direct thermal, YUPO direct thermal and YUPO labels 50×30 |
| Product information | 80×40mm | Product name 14pt bold; 3 lines at 10pt for product information, storage method and other notes | Direct thermal roll labels and YUPO direct thermal labels 80×40 |
| Shipping notice | 100×150mm | Shipping notice title 20pt; recipient, address, phone number and sender 13pt; caution text 11pt | 100×150 direct thermal rolls or fanfold media |
| Storage management | 40×30mm | Storage management title 11pt; 3 lines at 8pt for product name, opening date and use-by date | 40×30 isn't among the 16 direct thermal roll label sizes, so use 40×25 or 50×30 instead |
| Item management | 70×40mm | Item name 12pt, location 9pt, Code 128 sample (00001234) | Direct thermal roll labels 70×40, YUPO labels 70×40 |
All 6 templates are saved at 203dpi. If you use a 300dpi printer, choose 300 DPI in the printer setup window (the Printer button in the ribbon) after opening the document; barcode bar thickness is then recalculated for the new resolution. Choose products by media size from direct thermal roll labels, or from YUPO direct thermal labels for uses where the labels get wet.
4 steps to adjust a template whose size differs from your media
A template always opens at the mm size shown in the list, and the designer doesn't stretch or crop its contents to fit. In a document linked to a GoodLabel media size, if you open the window with Open template in the ribbon, a checkbox at the top that shows only templates of that size (for example 50 × 30 mm) is turned on, and if no template matches, a button to show all sizes appears. If you clear the checkbox and choose a template that differs from the linked media by even 1mm, a note under the preview says the template will open as a new document without the product link.
- Open the template closest in size as a new document.
- In Printer settings in the ribbon, change the width (10–500mm) and height (5–1000mm) to your media size.
- After the change, objects keep their mm positions and sizes, so if you reduced 40×30 to 40×25, the bottom 2mm of the 3-line text box (11mm from the top, 16mm tall) goes off the label; reduce the box height or drag it up 1–2mm.
- Check that the right end of the barcode object falls inside the label, and if it overflows, reduce Barcode width in the Properties panel by one step.
How to measure media width, height and gap in mm continues in the label size measuring article, and how far you can shrink text in pt on small labels like 40×25mm continues in Small label design basics.
Changing sample text and numbers in 3 places
The template opens in a new tab next to the document you were working on, and the original tab's content stays as it was. Edit text by double-clicking it on the canvas, and where one object holds 3 lines, as in the product information template, break lines with Enter.
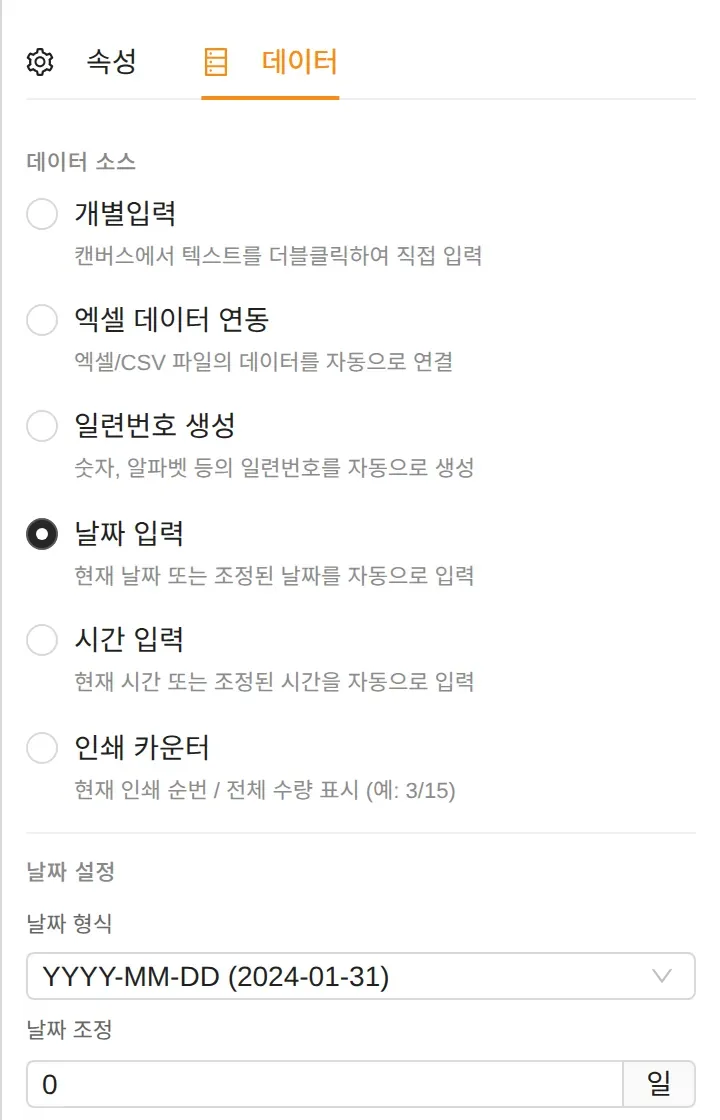
- To fill the opening date line of the storage management template with the print date, keep that text and add another text object next to it, then choose Insert date on its Data tab. Make the use-by date line the same way, entering the storage period (e.g., 7 days) in Date offset.
- 00001234 in the item management template is a sample number, so printing it as is gives every label the same number. To increase the number by 1 for each item, turn on Generate serial numbers on the barcode's Data tab, and follow the continuing serial numbers article for printing in sequence.
- The 4 lines at 13pt in the shipping notice template can stay as handwriting fields, and when orders grow, move on to the zone layout in the 100×150 shipping label article.
Saving the edited template as .glb
A tab opened from a shared template is a new document with no file path, so clicking the save button in the ribbon opens a window asking for a location, and a .glb file is created under the name you give there. If you have several labels in the same layout with only the item differing, save the first file and then use Save as to keep one file per item. From then on, open the .glb directly from Recent files on the start screen or with Open, and open the 6 shared templates only when starting a new size.
Opening a .glb file brings back the printer and resolution from when it was saved. So a file you saved after switching to 300dpi doesn't need to be switched again next time. Screenshots of the shared templates window are in the Shared templates and label purchase chapter (in Korean).