
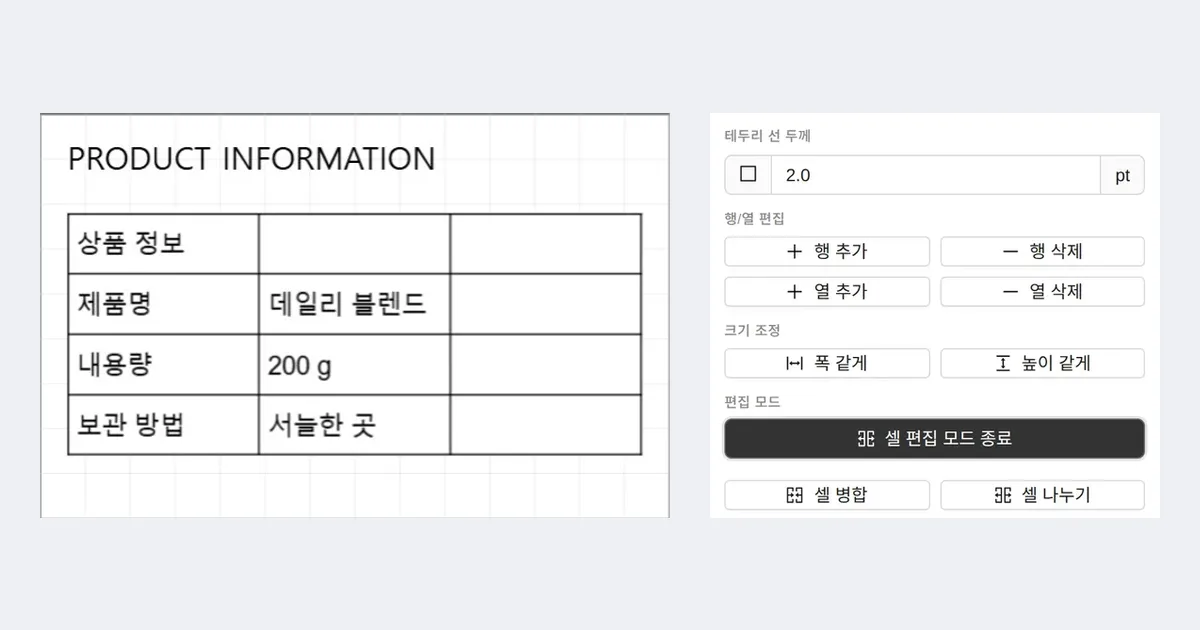
Products made dozens to hundreds at a time, such as jams, fruit syrups, soaps and candles, have long ingredient and origin text that differs a little from item to item. If each batch is around 50 and ingredient sources change with the seasons, printing just the day's quantity on a label printer suits better than ordering from a print shop. In GoodLabel Designer, 3 things fit long ingredient and origin text onto a small label: a 2-column table, narrower text width and an Excel link. The required items and minimum font size are set by the law for each product type, so for food in Korea, first confirm the items in the food labeling article (in Korean), and for clothing, in the Korean care label rules article (in Korean).
Choosing the label size by amount of text
GoodLabel Designer sets line spacing at 1.2 times the font size. So if you leave 1.5mm free at the top and bottom of the label, the number of lines for each font size can be worked out in advance, as in the table below.
| Font size | Line height | 30mm tall | 40mm tall | 60mm tall | 80mm tall |
|---|---|---|---|---|---|
| 6pt | 2.54mm | 10 lines | 14 lines | 22 lines | 30 lines |
| 7pt | 2.96mm | 9 lines | 12 lines | 19 lines | 25 lines |
| 8pt | 3.39mm | 7 lines | 10 lines | 16 lines | 22 lines |
| 10pt | 4.23mm | 6 lines | 8 lines | 13 lines | 18 lines |
One line of product name, 4 lines of ingredients, 2 lines of origin and 1 line for the manufacture date and lot come to 8 lines. For products whose body text must print at 10pt, 8 lines fill a 40mm height with no lines to spare, and even one more line of ingredients overflows, so start looking at 60mm-tall sizes. The line counts in the table assume text lines stacked with no gaps, so dividing the fields into a table reduces the count further by the cell padding.
Splitting item names and content into a 2-column table
For text that repeats "item: content", like ingredients and origin, making 2 columns with Table in the tool panel makes it easier to adjust when lines overflow than cramming everything into one text object.
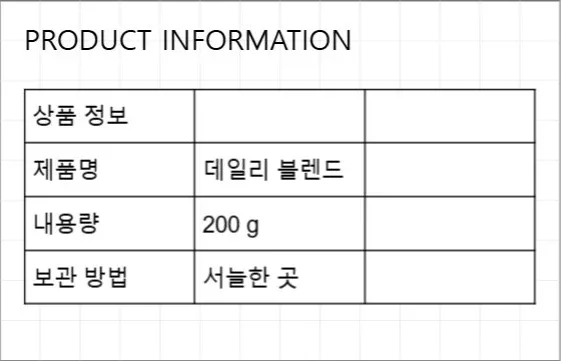
- With the Table tool, make a new table with 2 columns and as many rows as items, and narrow the left column to 15–20mm.
- Enter item names such as ingredients, origin and net content in the 3–5 cells of the left column and turn on Bold.
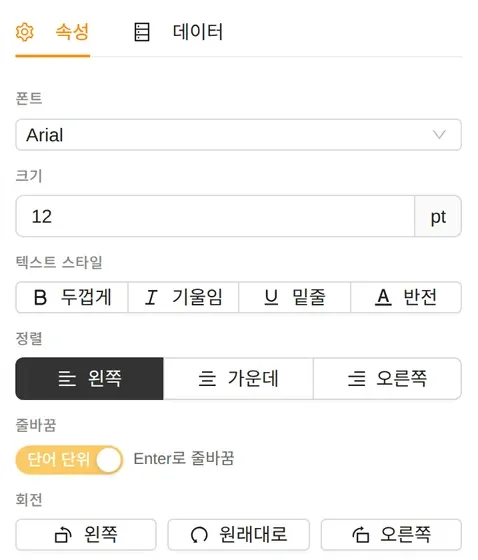
- Enter the content in the right column, and adjust Font size in the Properties panel in 0.5pt steps.
- Leave the row height mode in the Properties panel at Minimum height (automatic). When content grows, rows grow with it; the other option, Fixed height, doesn't show lines beyond the mm height you entered.
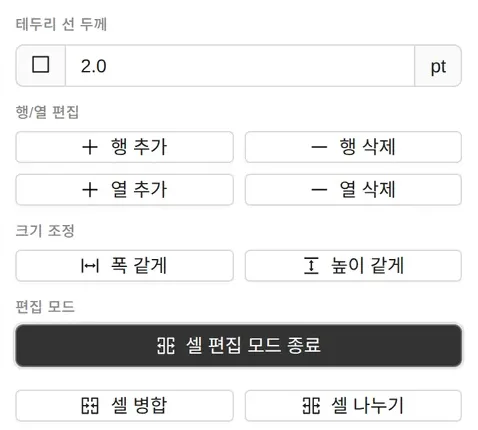
- The padding inside each cell changes in 0.25mm steps between 0 and 20mm, so on small labels lower it to about 0.5mm to win back lines.
For lines that use the full table width, like the product name, select both cells of the first row together and combine them with Merge cells; if you merged the wrong ones, undo it with Unmerge cells. When the text in a cell overflows it, the number of overflowing cells and a Fit to contents button appear at the top of the Properties panel. Screenshots of the table editing screen are in the Tables · Shapes chapter.
What to reduce first when ingredients overflow
- For an ingredients field written as a text object, narrow the text width first. Each click of Narrow text in the ribbon's Paragraph group reduces the character width by 10%, stopping at 70%, while the character height stays the same, so more characters fit on one line while keeping the pt size. In Korea, food products whose information panel is 100cm² or larger, or whose labeling is shortened by using a QR code, have a minimum character width of 90%, so narrow such labels only once (90%).
- The narrow button applies only to text objects, not to table cells, so for an ingredients field made as a table, lower that cell's font size by 0.5pt at a time and reduce the cell padding. Leave the sizes of the product name and origin cells alone.
- If it still overflows, split the label into 2. Put the product name and weight on the front and the ingredients, origin and manufacturing information on the back, making the two documents the same size and saving them separately.
Deciding whether to go below 6pt, edge margins and resolution issues that break thin strokes are covered further in Small label design basics and choosing printer resolution.
Linking Excel when you have more than 5 items
When more than 5 items, such as strawberry jam, apple jam and yuja (citron) syrup, share the same layout with only the ingredients changing, writing one item per row in a single Excel file leads to fewer mistakes than editing the document for each item. Match the columns one-to-one with the label's content fields, such as product name, ingredients, origin and weight. Excel columns link to text and barcode objects, so on this label keep only the item names in a table or as fixed text, make the 4 content fields text objects, and choose a column for each.
For text objects that receive long ingredient cells through the Excel data link, choose Wrap text in the Properties panel between By word and By character. A long comma-separated ingredient list leaves large blank spaces at the ends of lines with By word, so on labels with narrow fields switch to By character to fill each line to the end. For text typed directly with Manual input, this switch isn't available, and one press of Enter makes one line break.
If you place even one Insert date or Generate serial numbers object on the same label, the field for choosing an Excel column on the other objects is blocked. So make the manufacture date and lot number Excel columns too and link them together, and follow the Excel and CSV variable label article for file preparation rules.
3 test prints before finalizing the layout
- Print one label for the item with the longest ingredient list and check that the last line is at least 1mm from the bottom die-cut line.
- Measure the height of the body digits with a ruler and confirm that they're larger than the minimum size the law for that product type sets in mm or pt.
- For labels that go on small-diameter bottles or round tubs, stick one on an actual container and check that the origin line doesn't wrap around the curve out of sight.