Connect an Excel file that contains a product list, and a single print job produces labels with different content for each row. The flow is ① design the label → ② connect data → ③ map elements to columns → ④ print.
Loading a file
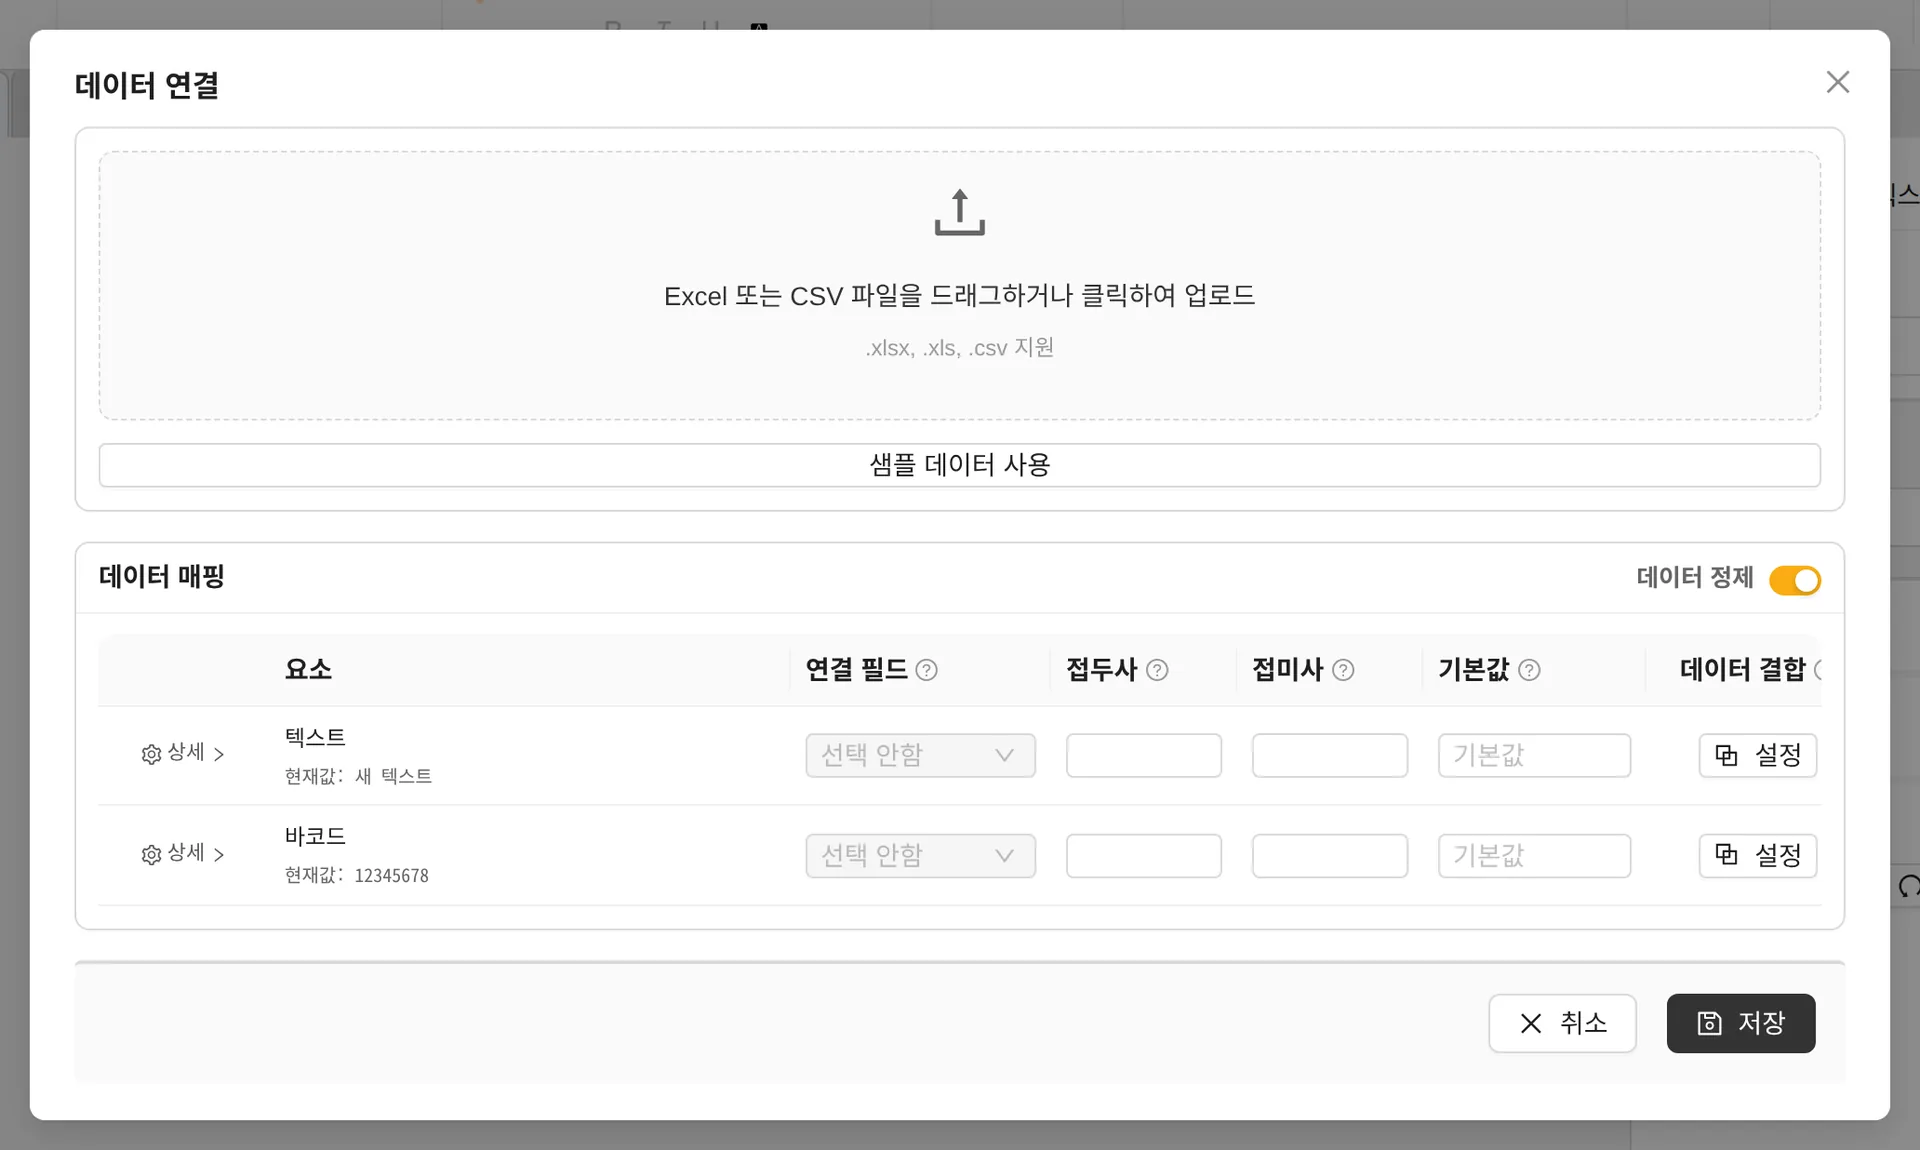
- Drag and drop or click to upload an .xlsx, .xls or .csv file.
- If the Excel file has several sheets, select the sheet to use.
- If this is your first time, practice the flow with Use sample data.
Data mapping
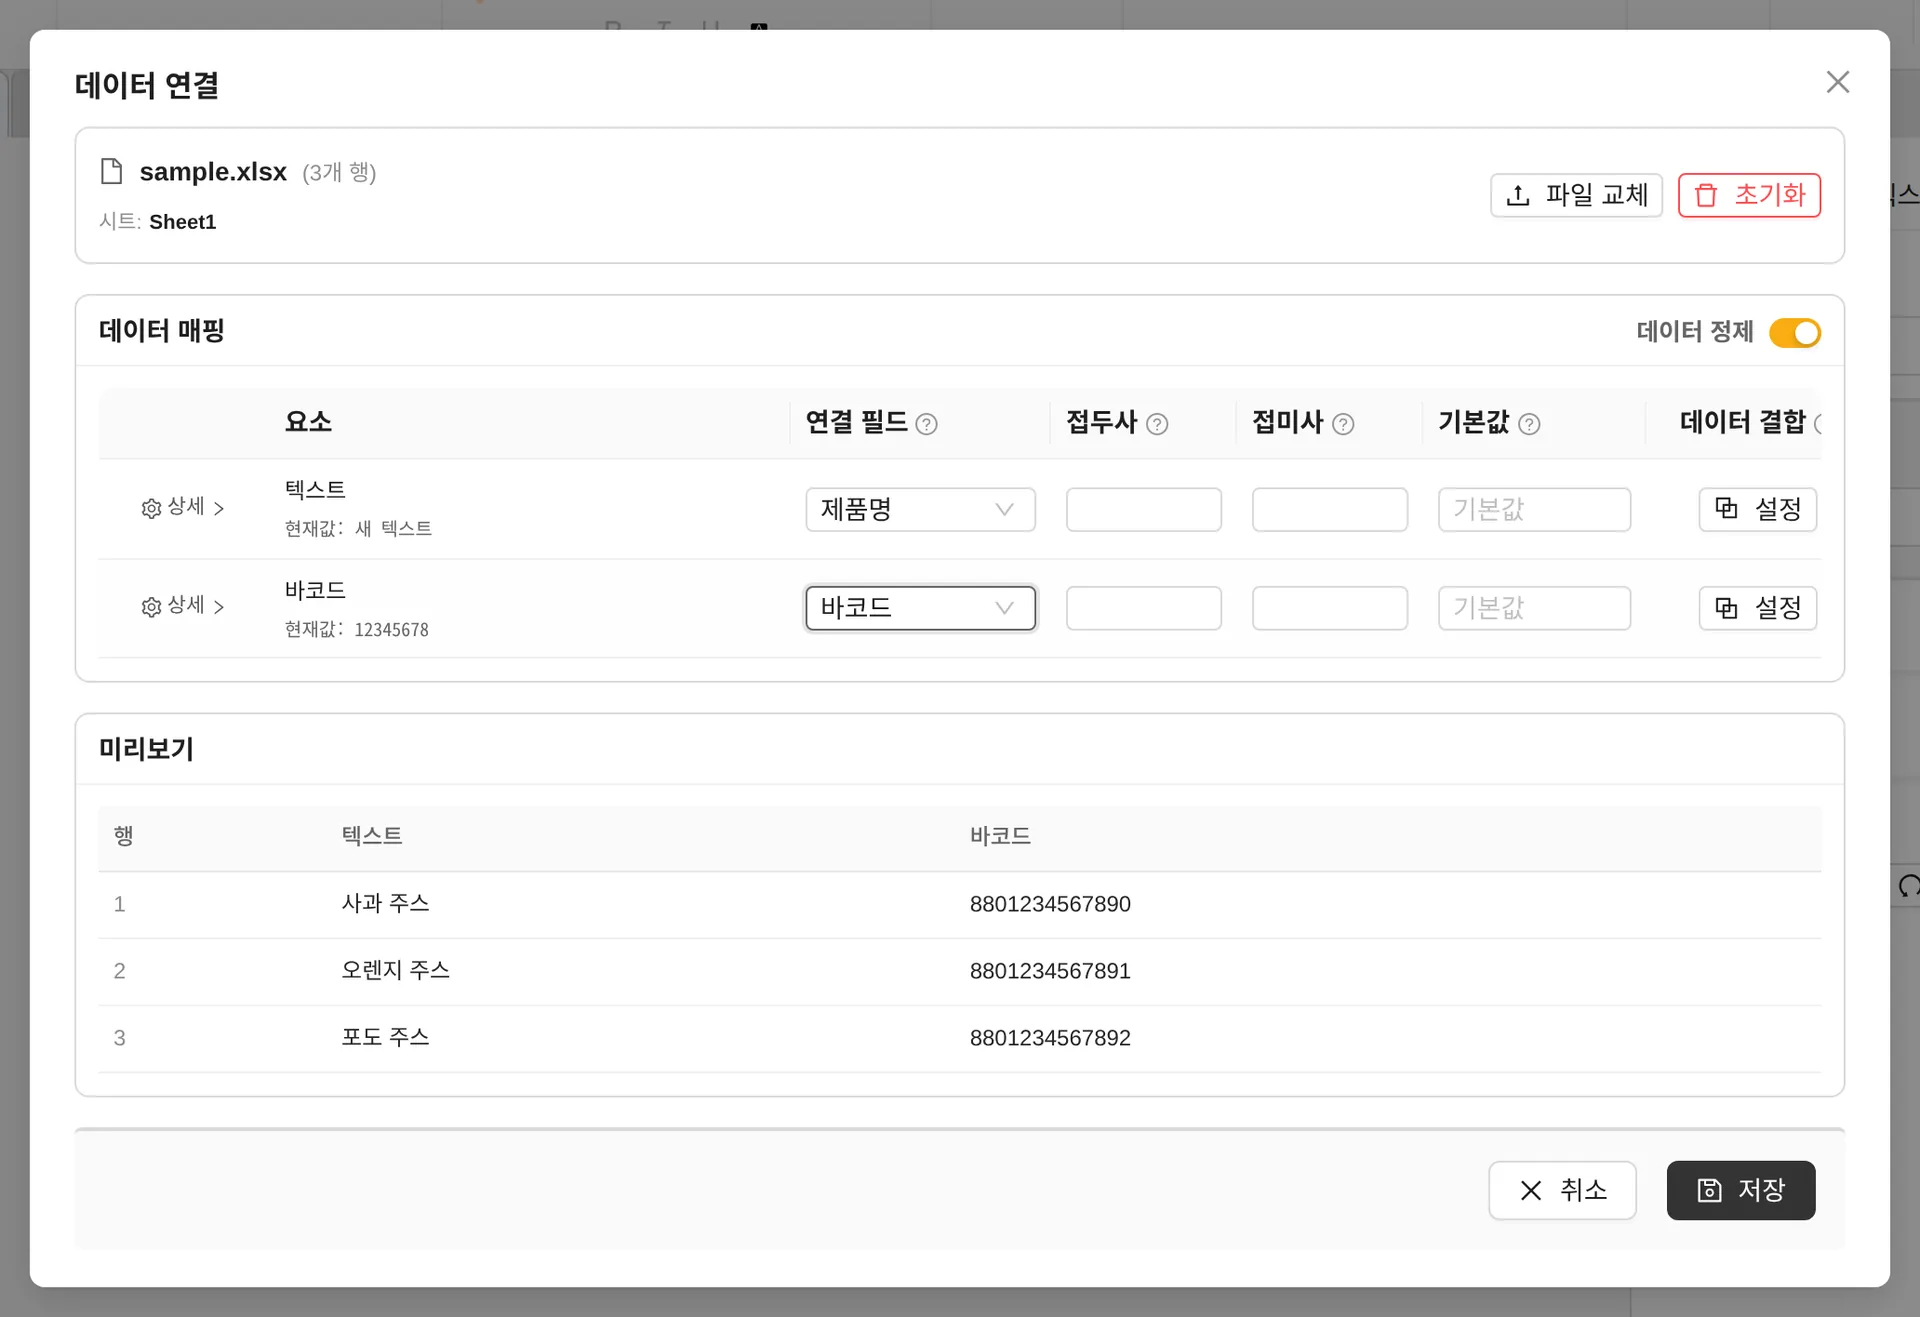
- Linked field — Assign an Excel column to each text/barcode on the label.
- Prefix/Suffix — Adds fixed text before or after the value. (e.g. SKU- , -KR)
- Default value — The value shown instead when the cell is empty
- Clean data — Automatically removes unnecessary spaces at the start and end of cells (on by default)
- Details — Converts Excel date values to the date format you want
- Preview — Check how the actual data fills in for the first 3 rows, then click Save.
Combine data — joining several columns
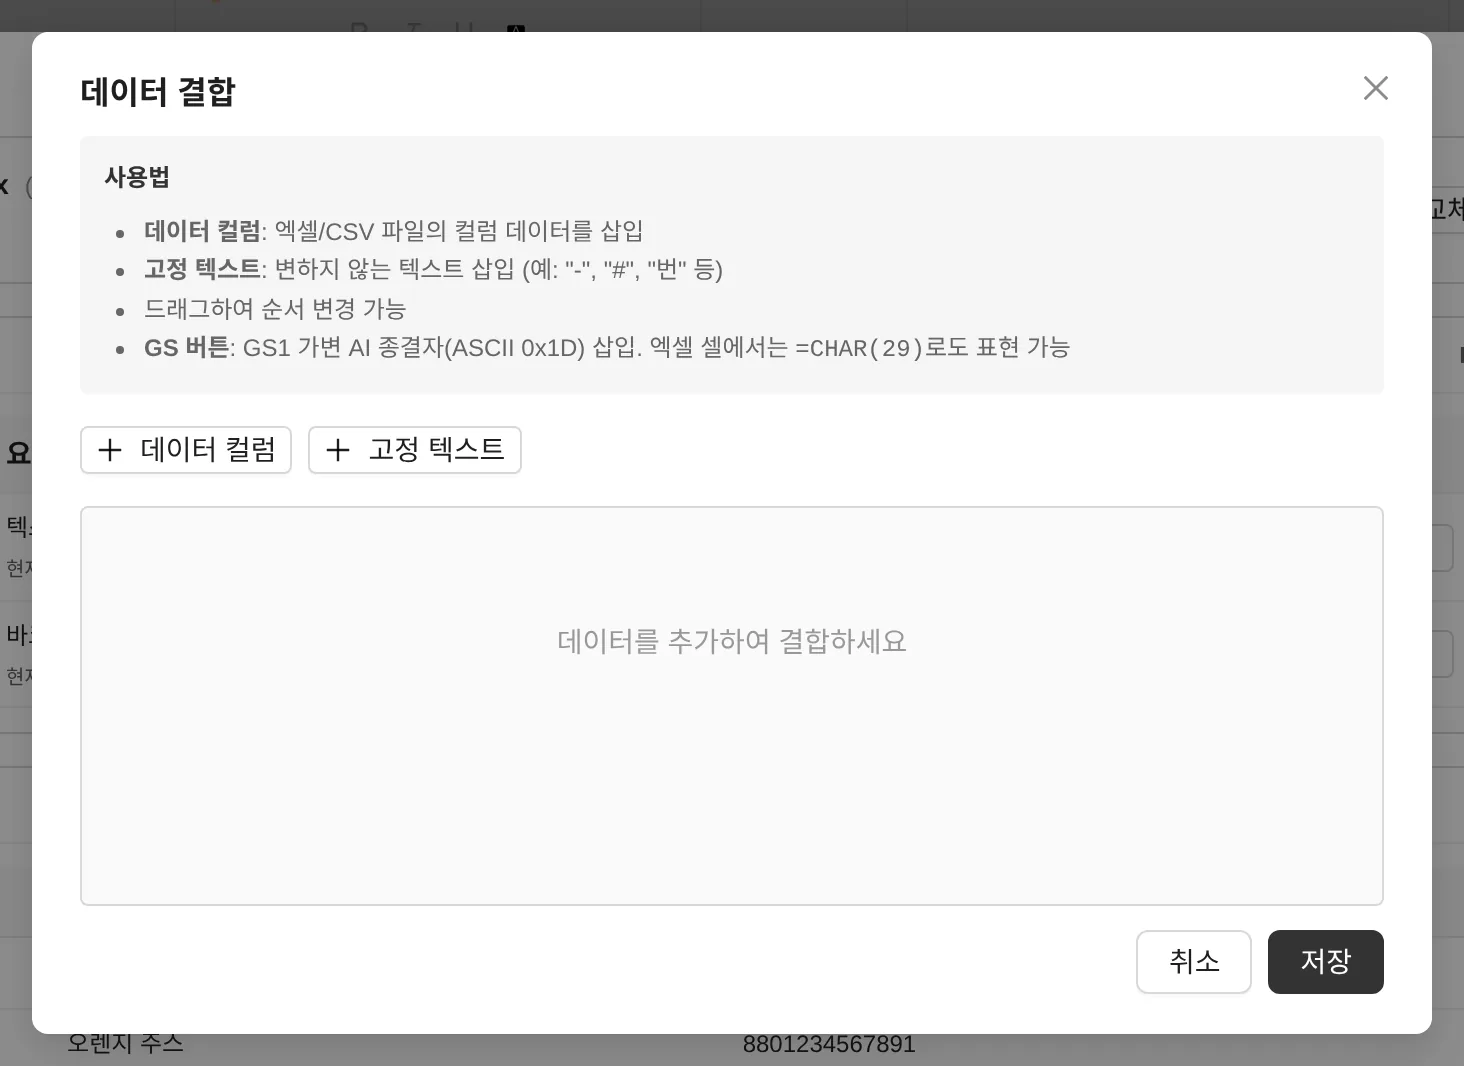
Click Settings under [Combine data] to join several data columns and fixed text in order and put them into a single element. (e.g. item number + "-" + color code) Drag the blocks to change their order.
Linking from the element side
![Choosing a field in the text [Data] tab](/guides/images/data-05-text-binding.webp)
After loading data, you can also change the linked field by selecting an object and going to [Data] tab → Connect Excel data in the properties panel.
Printing with data
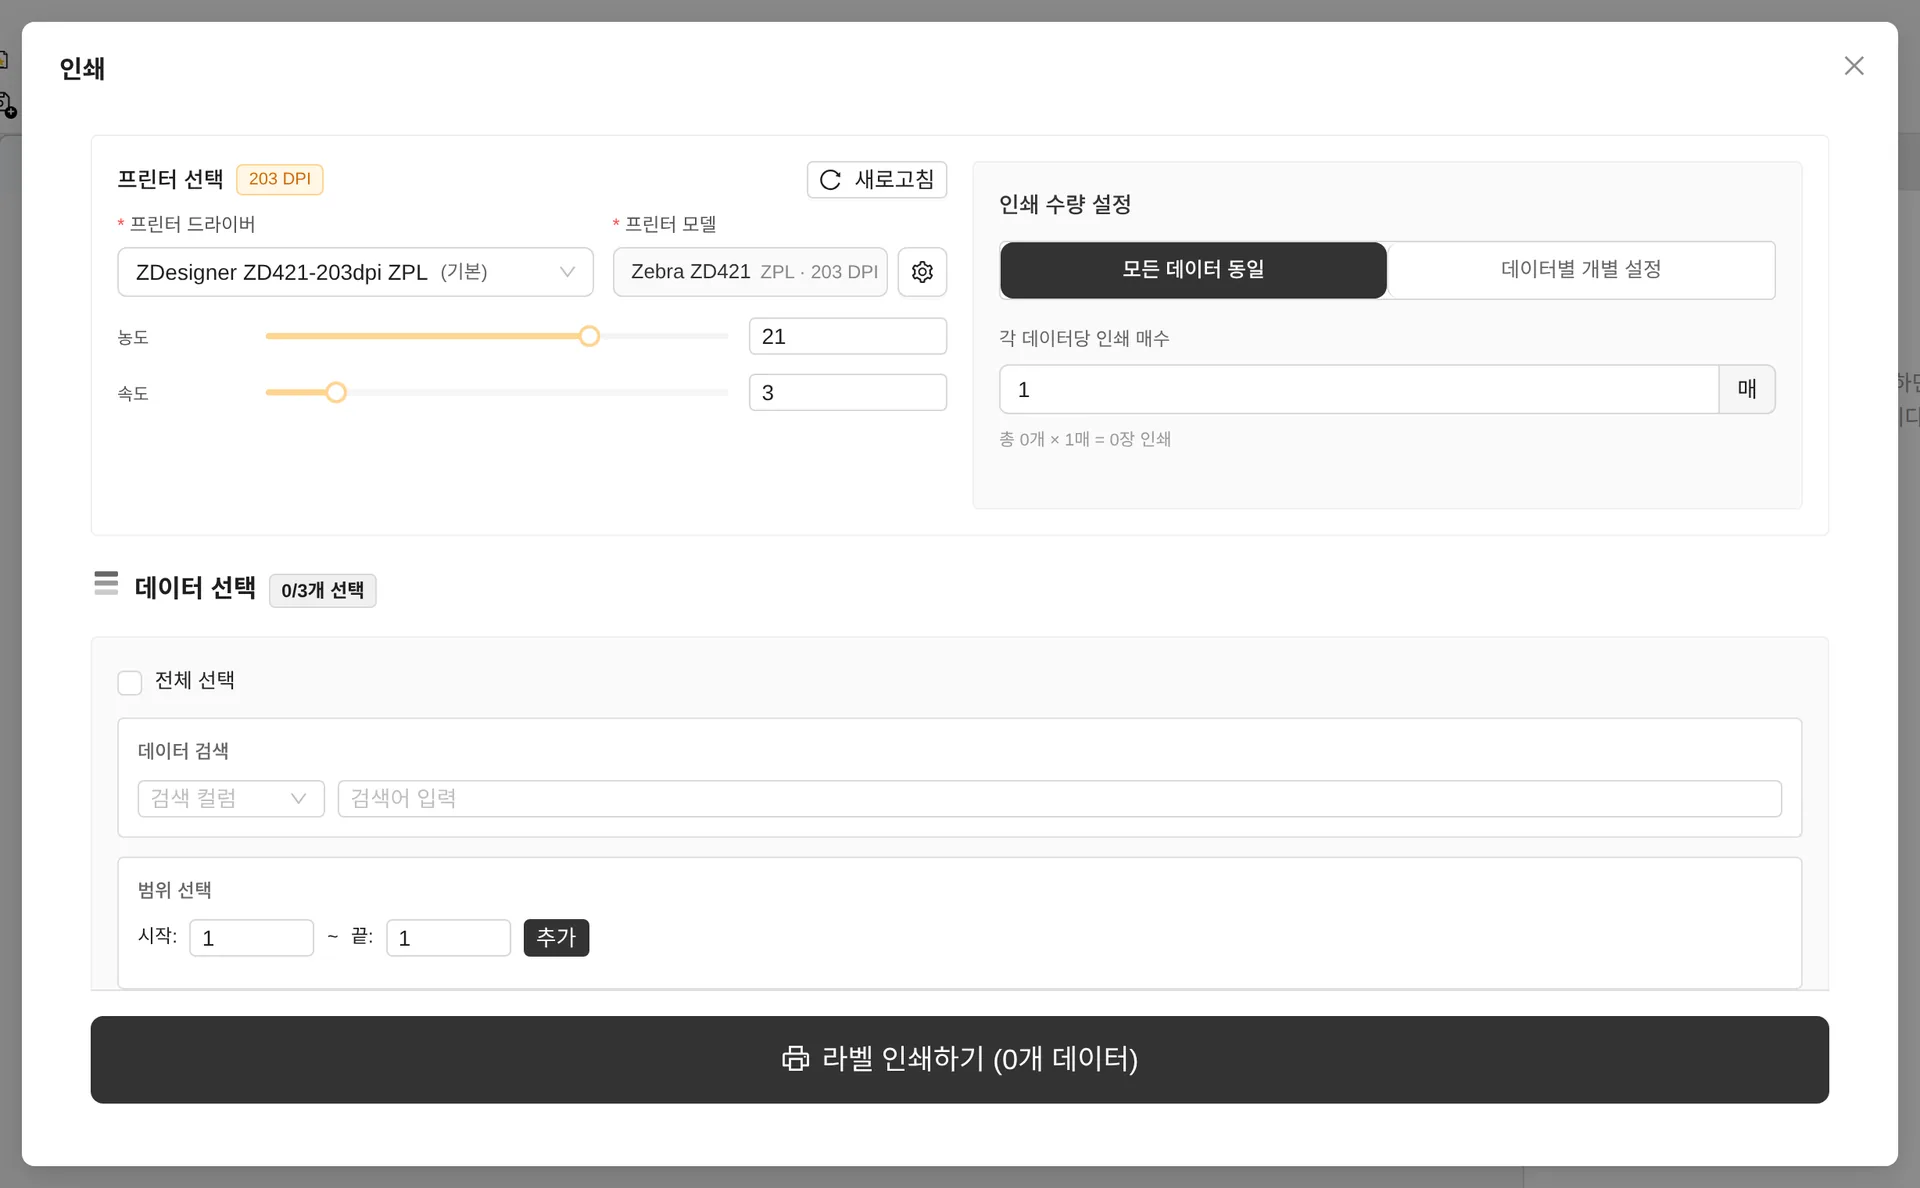
- Print quantity settings — The same for all data (N copies each) or Set per record (specify a quantity column)
- Select data — Check the rows to print. Search and Select range (e.g. rows 10–50) are also supported.
- Rows whose GS1 barcode fails validation are excluded automatically.
If any object uses serial numbers, data connection is locked. Follow the notice to clear the serial number setting, then connect the data.